How To Remove a Henna Tattoo Dye: Quick and Easy Ways (For Face, Body, and Hair)
Even though it is considered to be temporary, removing henna tattoo dye is definitely easier said than done. Regardless of whether you wanted to try out a small henna pattern-style tattoo, or you wanted to de
your hair, all the henna users know that it can take weeks before the dye actually goes away.
Despite being placed on the outermost skin layer (like any skin product) henna dye can only be removed in a few specific ways. In the following paragraphs, we’ll cover the best quick and easy ways and methods you can utilize to get rid of the unwanted henna dye in just a matter of seconds. So, without further ado, let’s get started!
Removing Henna Dye – Everything You Need To Know
What Is Henna Dye?
Before we jump into the tips and tricks of henna removal, we first need to figure out why it is so hard to get rid of the dye in the first place.
So, let’s take a look at what henna dye is to understand its staining efficiency!
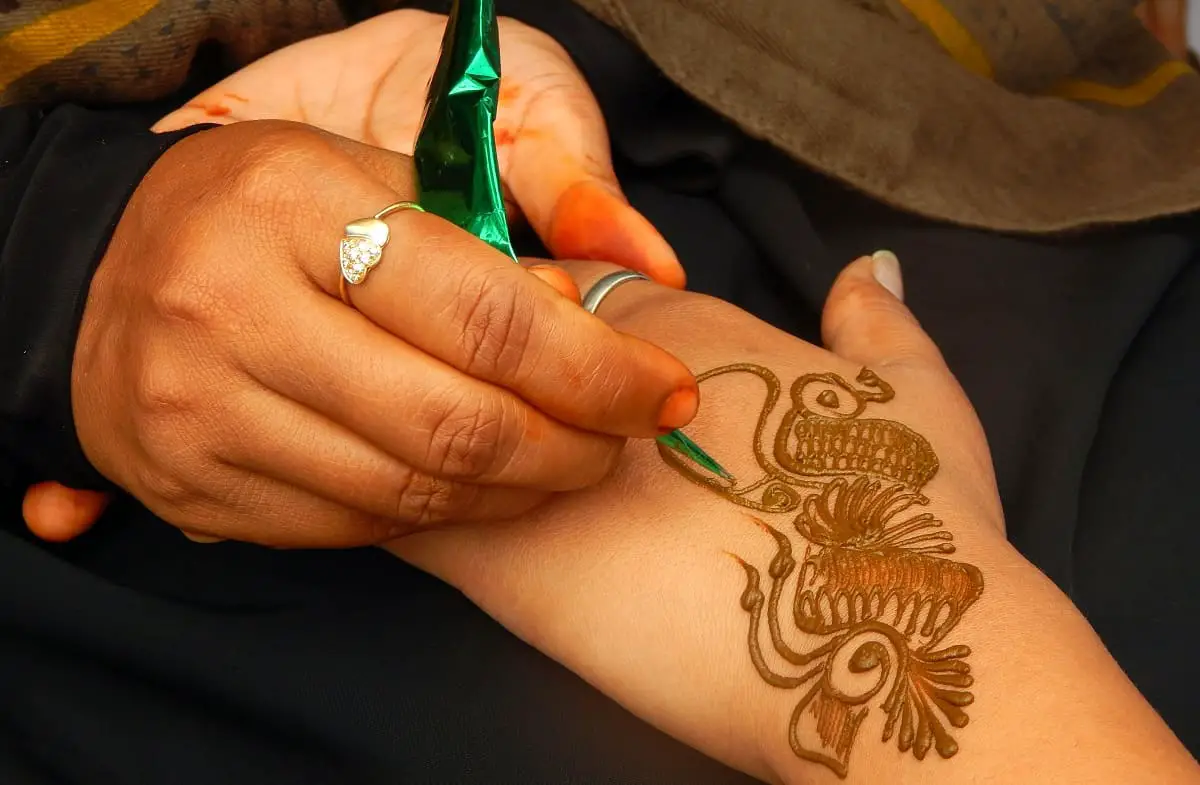
Henna dye is the type of fye that is derived from the henna plant leaves. The leaves are generally crumbled, crushed, and turned into a powder which later when mixed with a bit of water (or other ingredients like essential oils) turns into a henna paste. The paste is pretty potent and needs to be applied using a piping tube (this also contributes to a controlled, detailed application as well).
How Does Henna Dye Work?
Once applied, the dye in the henna (molecule called Lawsone) holds onto the keratin of your skin, making it easier for it to stain the skin and keep the henna design in place. As such, a henna design can last approximately 7 to 10 days, in cases of high-quality, all-natural henna dye. The same goes for the hair; once applied, the dye in the henna paste containing the molecule Lawsone binds to the hair proteins, creating a fast dyeing effect. The molecules stick to the hair and wash out after a few washes, but in some cases, it tends to stick around and change the natural hair color.
How Do I Remove The Remaining Henna Dye?
Note! Before we get into the tips and tricks, make sure to read the following paragraphs!
We want to warn our readers about a few things! First, stay away from the black henna dye. It is not a natural product and contains a chemical known as PPD. The chemical is generally used in controlled amounts in regular hair dyes, but in some countries, like India and South Asia, it is not a controlled ingredient. Therefore, ready-made black henna pastes and dyes contain dangerous amounts of this chemical.
When applied to hair and skin, it can cause severe chemical burns, skin/scalp irritation, rashes, blistering, and severe scarring. It is a common allergen that can trigger serious allergic reactions. Natural, good-quality henna is always of an orange, brownish color, so that is your telltale sign that a henna product is natural r chemical.
The second thing we want to warn you about regards the henna removal tips including bleach. There are many ‘articles’ out there covering henna removal using bleach. As you may know, bleach can be incredibly damaging to the skin, to the point where it can cause severe chemical burns. Do NOT use bleach on your skin and hair no matter how logical it may seem. Also, stay away from the tips and tricks advising you to use lemon juice, toothpaste, and baking soda. These all can be skin-damaging as well.
So, how does one get rid of the henna dye?
The henna dye can be pretty hard to remove, mostly because of the molecule binding. So, it is always essential to look at the methods which promote the separation of the molecules from the skin and hair. It can be hard to get rid of all the dye, and it can surely take some time. However, some of our tips can speed up the process and remove the dye stains in no time.
Antibacterial Soap Wash
This may seem obvious and redundant, but always try to first wash off the dye using antibacterial soap. A simple concoction of lukewarm water and soap can help effectively fade the henna stains. Sure, the stains won’t disappear completely, but the fading effect of the soap will help the removal process little by little.
But, why is antibacterial soap good at henna dye removal? Well, it’s all about the high alcohol content of antibacterial soap, compared to the regular one. The alcohol disrupts the molecule binding and gets rid of the clingy Lawsone molecules.
The only downside to this is that antibacterial soap can be pretty drying for the skin. You don’t want to be solving one problem only to create another one. So, after washing the skin with the soap, always make sure to then hydrate it. Use deeply hydrating lotions to restore the skin’s hydration and shine.
Note: We do not recommend you use antibacterial soap on body areas other than your hands. The skin on the hands and arms is more resilient and can withstand the intensity of antibacterial soap. However, the rest of the body, especially when it comes to one’s hairline, can get significantly dried out, so you need to opt for gentle removal options (we’ll talk about those in a second.
Micellar Water
Because it is not recommended to use antibacterial soap for dye-removal in the case of hair and body, we recommend a more gentle option, which is micellar water. Simply apply the micellar water to the stained area, leave it there for 10 to 20 minutes, and wash off. You can use it on your forehead and hairline, and it won’t strip or dry out your skin. If you want to improve the efficacy of the micellar water, try gently rubbing it across the stained area. You can also use micellar water across your body, so in case you have henna dye stains on areas other than your hands, micellar water is the product to go for.
Coconut Oil
Okay, we know that coconut oil tends to clog the pores and create a bit of a mess for those with sensitive and acne-prone skin. However, it is an excellent product that can help you get rid of the henna dye stain in no time. Our tip for using coconut oil; don’t simply rinse it off! Make sure that after you use coconut oil, you thoroughly wash your hands, your body, and especially your face, forehead, and hairline.
Make sure to use a cleanser, a face wash, or simply follow your regular face- and body-cleaning routine. Rinsing it off with just lukewarm water is NOT enough and in that case, the oil will clog the pores.
To use coconut oil for henna dye removal make sure to spread it over the henna-stained area for 10 to 20 minutes, just like micellar water.
Exfoliation
Because the henna dye as well as the design stays on top of the skin, dye removal can be furthered by using an exfoliation scrub. Now, physical exfoliator, when used excessively or not gently, can cause more harm than good. They can strip the skin and dry it out, so always make sure to use high-quality products and apply them gently onto the skin. It isn’t even necessary to rub the scrub around; just apply it, make a few circle motions around the stained area and let the srub do its thing.
Now, you cannot use the same scrub for your whole body. Some physical scrubs can be pretty irritating for the face skin, for example. In case the henna dye stains are on your forehead or hairline, we recommend you go for chemical exfoliants. These are mild, but effective exfoliants using hydrating, nourishing ingredients. Nobody wants to cause irritation on their faces, so always use chemical exfoliants or exfoliating cleansers for the face and hair area.
For the rest of the body, like your hands, for example, you can use physical exfoliants. We recommend you go for sea salt scrubs containing nourishing oils, or even sugar-based scrubs. Both will do well in disrupting the molecule binding and help fade out the henna dye stains in no time.
Final Thoughts
And that’s it! These are our top recommendations, tips, and tricks when it comes to henna dye removal (for face, body, and hair). If you’re having trouble getting rid of henna dye stains, we definitely recommend you pay a visit to a dermatologist who will further advise you regarding stain removal. For now, make sure to try out our recommended methods and surely stay away from bleach, toothpaste, lemon juice, and baking soda. You want to get rid of the stains, not your skin, right? Good luck and have a safe henna dye removing session!
- Safe, non-toxic plant-based temporary tattoos made with 100% high-definition printing for a realistic look without the pain
- Easy to apply and remove - just stick for 20 seconds then take off
- Set includes 5 sheets with 17 fun, delicate designs like hearts, cats, smiles, suns, moons, and more
- Waterproof and long-lasting - stays on up to 2 weeks of wear
- Fashionable for women, men, girls and boys
- Place on arm, wrist, neck, leg, finger, waist, foot and more
- Great for parties, birthdays, and showing your unique style

