How To Make Your Own Temporary Tattoo (Top 3 Methods That Always Work)
Temporary tattoos are fun and very exciting! Well, until you realize you’re spending tons of money just to keep yourself entertained with some temporary tattoos that will last you a week or two at best. If you’re tired of spending your money on temporary tattoos (or real ones as well), we’ve got you covered. In the following paragraphs, we’ll share with you some tips and tricks you can utilize to make your own temporary tattoos in no time. So, lay down, relax and let’s go through these temporary tattoo DIY instructions.
How To Make Your Own Temporary Tattoo: 3 Methods
1. Eyeliner Tattoo
Ladies and gentlemen, especially ladies, here’s the first groundbreaking discovery; eyeliner can be used to draw ‘lines’ on other parts of the body rather than just the eye. Incredible, right? Well, we all know that of course. But, for real, you can use an eyeliner to draw a temporary tattoo directly onto your body, wherever you want. If you’re interested in this method, here’s how you’ll do it;
Preparation
- Buy a new eyeliner; if you have an eyeliner that you use on your face, well, you cannot use it for drawing fake tattoos. Unless you plan on buying a new one for your eyes, make sure to use a clean eyeliner for this journey.
- Avoid buying liquid eyeliners; they will be hard to use for details since they’re harder to control and even harder to get remove from the skin.
- Make sure your target body area is clean and preferably hairless; if the area is hair-free, the eyeliner has a better chance of sticking and staying on the skin. It will also be easier to execute any design and details when the surface is smooth.
Execution
- Come up with a design or look for inspiration elsewhere; either way, have a design in mind that you’re going to use.
- Draw the design onto your skin directly, using the new eyeliner.
- Make sure to be patient and steady, so you avoid making mistakes.
- Once you’re satisfied with the design, use hairspray to coat the tattoo; a thin layer should be enough
The eyeliner tattoo should last between 3 and 5 days, in case you do not expose it to water for example. If you want to get rid of the ‘tattoo’, simply wash the area using lukewarm water and some soap. After you’re done, tap dry the area and moisturize it to help the skin retain moisture.
2. Printing Your Own Tattoos
In case you’re not very skilled in drawing real-life tattoos with eyeliner, don’t worry. You can simply print out your tattoo and apply it using some moisture. If it sounds easy, well, that’s because it is. So, for this method, you will, of course, need a printer, a water slide paper and a design of your choice. Here’s how the process will go;
Preparation
- You cannot print the tattoo onto regular paper. So, make sure to buy some water slide paper for the best outcome. You can order water slide paper online, or buy it in-store.
- Prepare some scissors to cut out the design, a cotton ball, and some water.
Execution
- For the first step, make sure to complete a design for the tattoo. You can draw some inspiration for existing tattoo designs, but it is always better to create original work. Use Photoshop to alter the design to your liking or any other photo-editing application.
- Place the water slide paper in the printer and print out your design.
- Use scissors to cut out the design; try not to cut too close to the tattoo, so you don’t disturb the outer lines.
- Apply the design/paper onto the skin.
- Dampen the cotton ball and apply it onto the paper; hold for 20/30 seconds, or until the design has transferred onto the skin and the paper slides off.
- Tap dry the ‘tattooed’ area using a paper towel; make sure to be very gentle and let the tattoo also dry on its own.
This tattoo should last you anywhere between 4 and 7 days, depending on how good of a job you did applying it. The tattoo will last longer if it was applied to clean, smooth and hairless skin.
When it comes to removal, you can get rid of this tattoo using some rubbing alcohol or any oil-based skin product. Just put some of the product onto a cotton ball and use it to rub the tattoo off the skin. Or, you can simply let the tattoo peel off on its own if you’re patient.
Tip: After you print and cut out the design, you can also place the paper in some water for 1 minute. Clean the designated skin area, and then apply the wet paper onto the skin. Let it sit there for several seconds, and then peel the paper off; the design should have transferred onto the skin. Use a damp cotton ball to remove excess paper from the skin. Tap try the ‘tattoo’ with some paper towel or regular towel. And that’s it!
3. Sharpie Tattoos
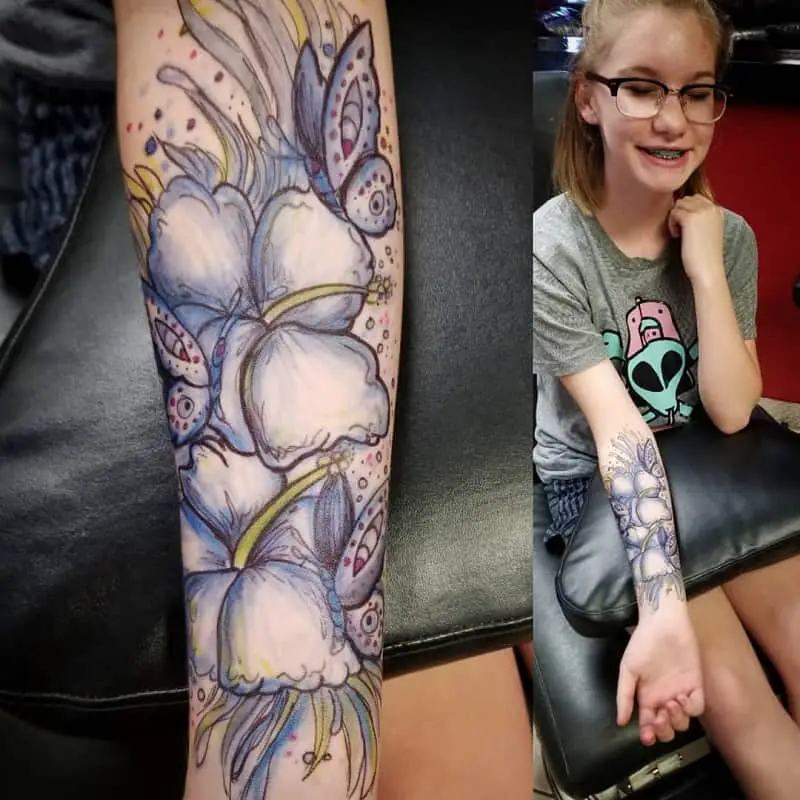
For this method, it’s time to go to the roots of your childhood; the sharpie. Remember how you used to, as a kid, draw things on your arms using a sharpie. Well, you and other children were clearly onto something. Sharpie can be used to create excellent temporary tattoos in a matter of minutes. Here’s how you can do it!
Preparation
- For this method, you will need the following supplies; a sharpie (preferably a black one but you can go for other colors as well), alcohol wipes, baby powder, and a liquid bandage.
- Also, you will need to have a design in mind that you’ll use for the tattoo; we recommend you go for simple designs since detailing using a sharpie can be hard to execute on skin.
Execution
- For starters, you will use the alcohol wipes to clean the designated tattoo area. It would be good to draw somewhere on your arms since the skin is usually smooth and hairless, so the tattoo will turn out better.
- Unless you’re an artist, your next step will be drawing a simple shape or design to serve as your tattoo; start with really simple designs if it’s your first time, like a heart, a flower, initials, or even a date.
- To ensure the sharpie will stay in place, you can apply a thin layer of baby powder onto the ‘tattoo’. Let the powder sit for about 10 seconds.
- Apply a small amount of liquid bandage onto the ‘tattoo’; this will help the sharpie stay in place and it won’t spread around.
- Let everything dry thoroughly, and you’re good to go.
This tattoo should last you up to 4 days, but it may stick around for a few more days if you place it somewhere where it won’t be exposed to water, for example. However, the whole point of temporary tattoos is to have them on for a few days and have some fun. So, if you’re looking for some short-term tattoo experience, then the sharpie method is an excellent alternative.
If you want to remove the sharpie tattoo, simply apply some rubbing alcohol onto a cotton ball, and rub the sharpie away. It should take you a few seconds for the alcohol to start breaking up the sharpie in the skin, so make sure to be gentle and patient.
Also Read: How To Make a Fake Tattoo With a Sharpie? – A Step By Step Guide
Make Your Own Temporary Tattoo: Bonus Option
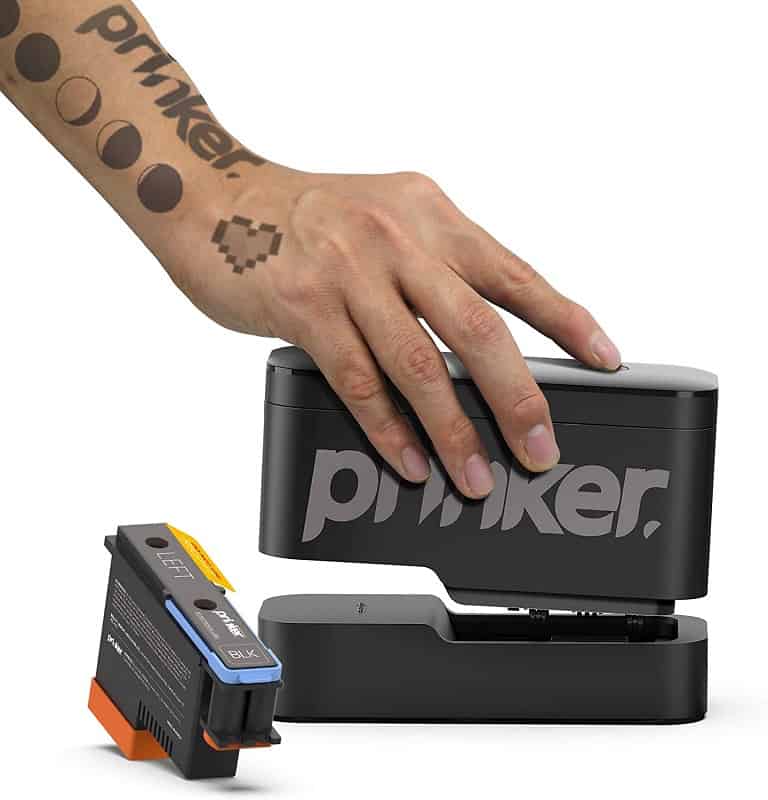
Have you heard of Prinker? Well, if none of the aforementioned methods don’t seem appealing to you, it is time for you to discover Prinker; a small device that applies temporary tattoos directly onto the skin. What an amazing time to be alive, right?
The Prinker is the world’s first device of this kind. It applies water-resistant temporary tattoos, which almost look like the real deal. The tattoos are vivid, and you can pick whatever color you want.
Here’s what else can you do with Prinker;
- You can create your own unique tattoo using the Prinker app.
- You can choose one of 8000+ design made by tattooist and artist from around the globe
- You can easily remove the tattoos in a matter of seconds.
- You can get a new tattoo every day since the Prinker set offers up to 1000 tattoos.
All you have to do is choose a design, your own or among the available design, and send the design to your Prinker device.
And then, simply roll the Prinker device on your body and watch the magic unfold in front of your eyes.
The Prinker-made tattoos last up to 3 days, which is more than one expects from a self-made temporary tattoo.
Final Thoughts
Making your own temporary tattoo is surely more of a satisfying process than just buying one. However, we always advise people with sensitive skin or skin conditions to refrain from these DIY methods where one is applying potentially toxic products not intended for skin use. This, of course, especially goes for products like hairspray and sharpie, which do contain potentially toxic ingredients.
So, if you do notice increased skin redness, rashes, itching, and burning, or any kind of allergic reaction, make sure to wash the ‘tattooed’ area immediately. In more serious cases, seek medical attention as well.
Other than that, we also wish you to have a lot of fun trying out these methods. They always work and always turn out amazing. Let us know in the comments if you’ve tried them and how they turned out!
Also Read:
- Safe, non-toxic plant-based temporary tattoos made with 100% high-definition printing for a realistic look without the pain
- Easy to apply and remove - just stick for 20 seconds then take off
- Set includes 5 sheets with 17 fun, delicate designs like hearts, cats, smiles, suns, moons, and more
- Waterproof and long-lasting - stays on up to 2 weeks of wear
- Fashionable for women, men, girls and boys
- Place on arm, wrist, neck, leg, finger, waist, foot and more
- Great for parties, birthdays, and showing your unique style

