How To Shade a Tattoo: Best Practices and Techniques You Need To Know About
Proper and properly executed shading can make or break a tattoo, let’s be perfectly honest. That is why it is essential to master the art of tattoo shading and make your tattoo designs come alive. Shading, however, doesn’t only make the tattoo look more 3D, but it also helps you cover up any mistakes made in the process of outlining.
Now, considering you’re reading this article, we’ll assume you’re either a tattoo apprenticeship, or you’re simply interested to see how to tattoo shading works. Either way, you’re at the right place. In the following paragraphs, we’ll talk about the best practices and techniques used to shade a tattoo. So, without further ado, let’s get right into it!
How To Shade a Tattoo
Practice Makes Perfect – Practice Tattoo Shading
Maybe you thought we’ll start by explaining the tattoo shading techniques done during the actual tattooing, but that needs to wait. First, you need to practice tattoo shading on mediums other than your client’s skin (you’ll agree that it’s kind of inconvenient to figure out you can’t shade a tattoo properly in the middle of tattooing). So, here are a few ways you can practice the art of shading without any harmful consequences;
- Start easy, with a paper and a pencil – did you know that the majority of tattoo artists have undergone some kind of artistic education (through art courses or college)? That is because creating tattoos is truly an artistic endeavor, and so is tattoo shading. Shading of any kind in art is considered a master technique and it needs a lot of practice, So, take a piece of paper, draw some kind of design and start shading.
- Follow online art classes, courses, or even video instructions – if you find it hard to practice on your own, utilize the Internet. Just like you found this article, you can as easily find online art classes and courses specially created to explain shading.
Sure, the majority of those classes and courses require payment, so if you’re on a budget, search through YouTube; there’s a plenty of super cool, elaborate, explicatory videos about shading provided by actual, experienced (tattoo) artists.
- Utilize practice ‘skins’ and synthetic ‘body parts’ – the best to upgrade your shading practice is to transfer from paper to fake skin. This will give you a realistic sensation of what it means to shade a tattoo on actual skin.
Now, for this, you will need access to an actual tattoo gun (since you probably have one as a tattoo apprentice), and fake skin. You can buy fake skin and synthetic body parts off Amazon, or you can simply buy pork belly for cheaper. Pork belly provides a sensation the most similar to human skin, plus it is super affordable.
- Pay attention to speed, needle type, and effect you’re going for – these are the essential aspects that differentiate between good and bad tattoo shading. Going at the right speed, using the right needle, and having in mind the effect you’re going for is crucial for executing the shading part perfectly.
That is why you need to educate yourself on types of shader needles, when and how they’re used, the speed at which shading is lighter or darker, and the way you can achieve certain shading effects. Then, you can continue your practice and turn it into a master technique.
Also Read: How Many Needles Are There In a Tattoo Gun?
Tattoo Shading Techniques
Considering you’re yet to learn about tattoo shading, we’ve decided to also explain the main tattoo shading techniques responsible for almost every known shading effect when it comes to tattoos. From creating 3D effects to having a tattoo appear as if it’s done by watercolors, here are the 4 main tattoo shading techniques you need to know;
- Brush shading – this is a shading technique used mostly for portrait tattoos, but also for types of tattoos that require blending. To execute this shading technique, you need to use a long taper needle, which you’ll move like a pendulum, back and forth, applying ink at an angle.
Gradually, the shade will grow darker as more ink is distributed on the skin. During the shading, the tattoo gun remains in place; only the grip rocks the needle back and forth.
- Whip shading – this is a shading technique suitable for a bunch of different tattoo styles. However, it is deemed perfect for applying sketches and flowers due to the effect it provides, which is that of pencil drawing. To execute this shading technique you’ll need a 3-round liner needle, but you can also settle with the needle you prefer to have at disposal.
In order to achieve whip shading, you need to make a quick, curve movement, releasing the needle pressure as the motion reaches the end. This will ensure more pigment is released at the curve, and the tip will appear lighter.
- Stipple shading – this shading technique is used specifically to create dotted lines (for different tattoo styles, of course). For this shading technique, you’ll use a 3 round liner needle with a long taper. Now, the way to execute this shading technique is to either use the whip shading or brush shading motion. Either way, your movement needs to be fast if you want the dots to be further away, or slow if you want to pack in the dots close to each other.
Other Things Important For Tattoo Shading
Tattoo Shading Needles
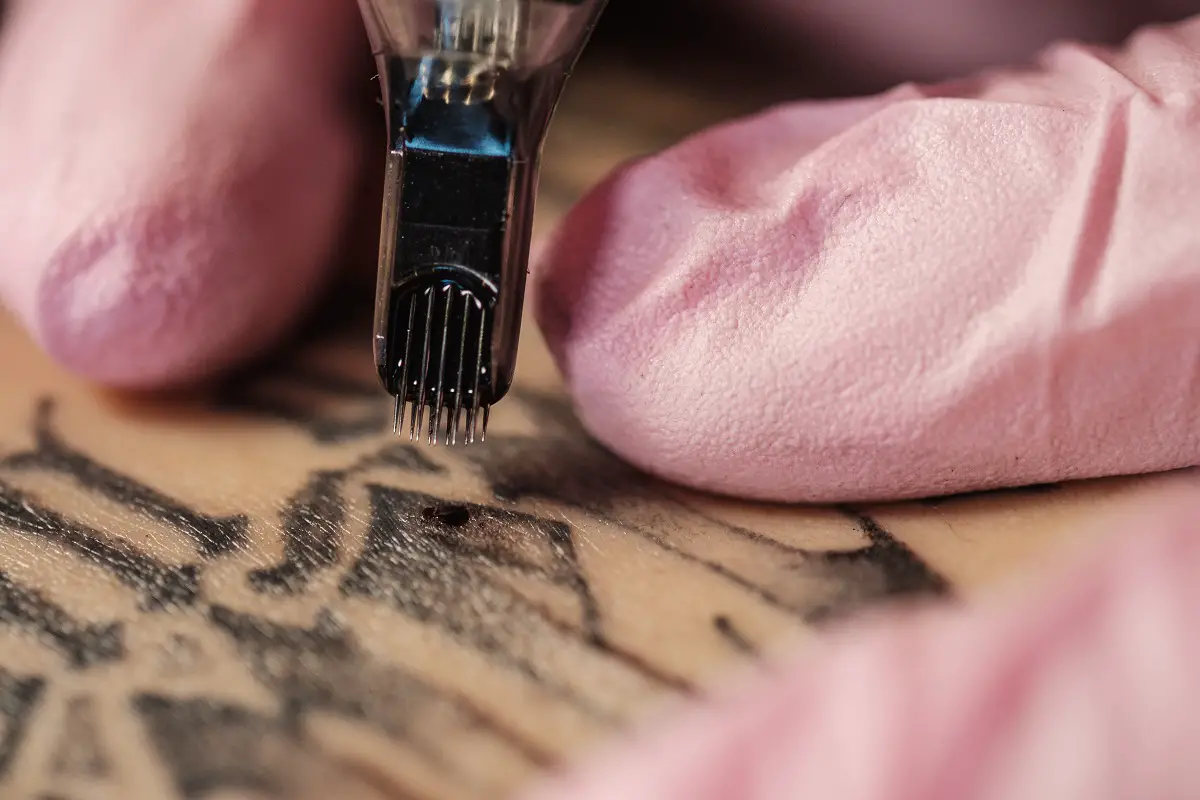
In order to execute any of the aforementioned tattoo shading techniques, you’ll need to familiarize yourself with the right shading needles. Of course, the round shader needles are the best for tattoo shading. These needles have specific code names, just like other needles, that refer to the type of needle, the number of needles it has in the grouping, etc. The regular code for round shaders is RS.
We also have to mention the Magnum needles, which are also super useful for shading effects. Magnum needles are arranged in two rows, and they can stack anywhere between 7 and 11 pins, for a standard shading effect.
For a denser shading, you’ll use stacked magnum needles, but if you want to achieve a more free-appearing shading effect, you’ll use the weaved Magnum needles. Stacked Magnum needles are excellent not only for shading but also for color packing. But, if you need to shade or color large areas, we recommend you go with the weaved Magnum needles.
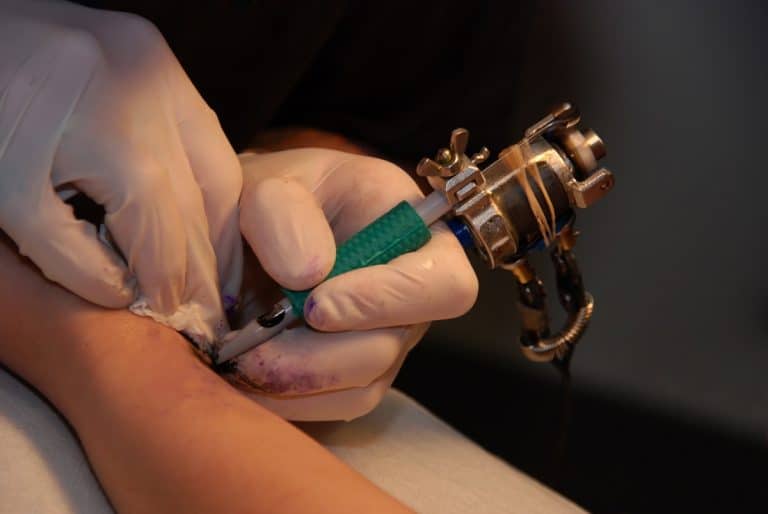
Setting The Tattoo Gun For Shading
You cannot start shading a tattoo without setting up your tattoo gun specifically for the shading technique. Here’s what you need to do;
- The distance between the armature bar and the contact screw needs to be 2mm.
- Of course, the needle and the ink tube need to be attached to the gun itself.
- Choose the needle based on the desired effect or the shading technique you’ll go for.
- Tune the tattoo machine; this means that you need to adjust the speed of the machine at which it’ll work and distribute the ink. Do not make the machine too fast, but also make it suit your levels of speed comfort.
- Make sure to stick to 10 volts for shading.
Knowing When To Shade
Many tattoo beginners make one crucial mistake when it comes to tattoo shading; they proceed to shade right after they’ve completed the tattoo outline. That is a huge mistake that can lead to a mixing of the lines and a messy tattoo. The best practice is to complete the tattoo outline, wait anywhere between 15 and 30 minutes for the ink to set and dry, and then proceed with the shading and coloring. This will make the shading so much easier, and it will make for a clean, mess-free tattoo.
Knowing the Duration of Shading
Another common mistake when it comes to shading is leaving the needle on the same spot for too long. Tattoo beginners believe that the longer a needle stays in one place, the better the color payoff and the overall effect will be. That is completely wrong.
By doing this you’re creating unnecessary trauma for the skin, plus the client will experience more pain during the session and the tattoo won’t look nearly as good as you imagined. This often happens in techniques where the needle has to go back and forth; if you’re unsure of this movement, you can always go in a circular motion to minimize trauma and skin damage.
Final Thoughts
And, that’s it! Now you know how to properly and effectively shade a tattoo. All that is left for you to do is to get to practice. Without practice, you won’t be able to develop a sense of shading, how the needle should work, at what angle, and how you should distribute the ink differently for different shading effects. Make sure to practice, utilize all the help available, and of course, always consult your mentor if you’re an apprentice. The mentor is there to help you and guide you through all the stages of tattooing.
Also Read:
- Safe, non-toxic plant-based temporary tattoos made with 100% high-definition printing for a realistic look without the pain
- Easy to apply and remove - just stick for 20 seconds then take off
- Set includes 5 sheets with 17 fun, delicate designs like hearts, cats, smiles, suns, moons, and more
- Waterproof and long-lasting - stays on up to 2 weeks of wear
- Fashionable for women, men, girls and boys
- Place on arm, wrist, neck, leg, finger, waist, foot and more
- Great for parties, birthdays, and showing your unique style

